Choosing orthopedic implants and instruments is not a simple purchasing exercise. It affects surgical accuracy, patient recovery, staff efficiency, and long-term clinical outcomes. The right decision requires more than comparing prices or reviewing attractive product images.
Sir John Charnley, a pioneer of modern joint replacement, emphasized the purpose of treatment: “Relieve pain and restore function.” That principle still matters when evaluating every implant, retractor, trial component, and surgical tray. Buyers should examine material quality, implant design, instrument compatibility, sterilization requirements, traceability, supplier support, and published clinical evidence. A polished catalogue cannot replace verified performance.
Small details often reveal major differences. Check the lot number on the package. Review the instructions for use. Confirm that instruments fit the intended implant system. Ask how quickly replacement components can arrive. Discuss training with the surgical team. Also consider cleaning time, storage space, maintenance, and total lifecycle cost.
A lower purchase price may appear efficient. It may not remain economical after repairs, delays, or discarded components. An expensive system is not automatically superior either. That assumption deserves questioning. No checklist replaces clinical judgment, transparent supplier communication, and careful review by qualified professionals.
These seven tips provide a practical framework for assessing orthopedic implants and instruments with greater confidence. They also encourage buyers to slow down before committing. Patient needs, surgical technique, evidence quality, and local regulatory requirements should guide the final choice. Mistakes can happen. Recognizing that risk is part of responsible procurement.
Tip 1: Define the clinical need before comparing implant prices. Record the procedure type, anatomical site, bone quality, load demands, and expected patient activity. A trauma case may require different fixation options than a revision procedure. Write these requirements in measurable terms.
Compatibility is not limited to implant dimensions. Check the matching instruments, insertion angles, locking mechanisms, imaging requirements, and sterilization processes. A component may fit on paper but fail during surgery if the driver or guide is unavailable. Confirm material composition when allergies or sensitivities are relevant.
Tip 2: Build a compatibility checklist with the surgeon, operating-room staff, and biomedical engineer. Include implant sizes, instrument trays, backup components, packaging integrity, and lot tracking. Review technical documentation and applicable regulatory records before purchase. Do not rely on a sales sheet alone.
A practical trial can reveal hidden problems. Test the instruments with training models or approved simulation systems. Check grip, visibility, connection stability, and cleaning access. Small details matter. One overlooked interface can delay a procedure.
Clinical requirements may change after imaging or intraoperative findings. Keep an approved alternative plan, but avoid unnecessary inventory. This balance is difficult. Teams sometimes order too much because uncertainty feels safer. A documented review of outcomes, sizing errors, and instrument issues can improve the next purchasing decision.
Approximate density of common orthopedic implant materials. Material selection should be matched to the surgical indication, required mechanical performance, imaging needs, fixation method, and patient-specific compatibility requirements.
Values are approximate and may vary by alloy grade, manufacturing process, and product specification. Always verify technical documentation and applicable regulatory requirements before purchasing.
When buying orthopedic implants and instruments, material quality deserves close inspection. Implant metals should offer strength, corrosion resistance, and biological compatibility. Request material certificates, test reports, and traceability records from the supplier. Surface finish also matters. Rough or damaged surfaces may increase tissue irritation and complicate cleaning.
Design should match the procedure, anatomy, and expected mechanical load. A well-designed implant supports stable fixation without unnecessary bulk. Check hole placement, edge shape, locking mechanisms, and size options.
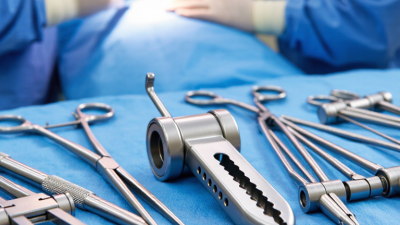
Instruments should feel balanced in the hand and provide clear tactile feedback. Handles must remain secure when gloves are wet. Small details matter.
I have found that instrument functionality is often underestimated. Test trial components with the related tools before purchase. Confirm that drivers engage fully and that guides align without excessive force. Poor compatibility can slow surgery and increase handling errors. Ask how the instruments are cleaned, inspected, and maintained. A sturdy case helps, but it does not replace routine checks.
Do not judge quality by appearance alone. A polished surface can hide weak documentation or poor dimensional control. I once assumed a heavier instrument would be more durable; that judgment was incomplete. Weight may reduce control and cause fatigue during long procedures. Independent testing, user feedback, and documented quality systems provide stronger evidence. Supplier support should include training, replacement procedures, and clear instructions for use. Test realistically. Small doubts deserve another review.
Before purchasing orthopedic implants or instruments, verify the manufacturer’s credentials, not just its sales materials. Request a current ISO 13485 certificate, manufacturing-site details, and evidence of quality-system audits. Confirm that the certificate covers the exact product category and production location. A certificate with the wrong scope is a warning sign.
Check regulatory authorization in the destination market. Review device registration, clearance, approval, or conformity records through the relevant authority. Confirm the device’s Unique Device Identifier, technical file references, labeling, and instructions for use. The FDA’s 2023 Medical Device Reporting data contained more than two million submissions across device categories. These reports do not automatically prove product failure, but they show why traceability matters. See FDA, Medical Device Reporting Program data.
Ask for sterilization validation, biocompatibility evidence, material specifications, and post-market surveillance records. Test lot numbers against shipping documents. Inspect packaging for broken seals, unclear expiry dates, or inconsistent labels. Small details matter.
Do not stop at paperwork. Speak with the quality manager and request an audit trail for complaints, corrective actions, and recalls. ISO 13485:2016 emphasizes risk-based control and documented processes, while the European Union Medical Device Regulation requires stronger clinical and post-market evidence for many devices. Requirements differ by market.
A practical weakness remains. Procurement teams sometimes accept scanned certificates without checking authenticity or scope. That shortcut can undermine an otherwise careful purchase. Independent verification takes time, but it can expose expired certificates, mismatched models, and incomplete evidence before surgery.
A low quote can still become expensive. Compare the full ownership cost, not only the unit price. Include freight, sterilization, storage, training, replacement parts, and instrument maintenance. Fortune Business Insights valued the global orthopedic devices market at about USD 52.65 billion in 2023. This growth increases supplier choices, but it also makes cost comparisons less transparent.
Ask suppliers for documented lead times, minimum order quantities, safety-stock policies, and shipment performance. A quoted delivery window means little without historical fill-rate data. Check lot traceability, packaging integrity, and procedures for delayed or damaged shipments. Request a contingency plan for critical implants and instruments. It should identify alternative production sites and communication contacts. A common purchasing mistake is trusting optimistic estimates. I would challenge them.
Technical support deserves equal attention. The World Health Organization reports more than two million types of medical devices globally. Compatibility, cleaning instructions, surgical technique, and staff training therefore require precise documentation. Confirm response times for urgent questions, field-service availability, instrument replacement, and notification procedures for design changes. Review whether support includes on-site training and documented competency checks. Ask for evidence, not promises.
The supplier should explain implant sizing, material specifications, sterilization limits, and packaging controls in clear language. Independent clinical feedback can reveal problems hidden by sales presentations. Compare at least three written quotations, then test every assumption against your hospital’s actual workload. Procurement teams sometimes overvalue a discount and undervalue downtime. That deserves reflection.
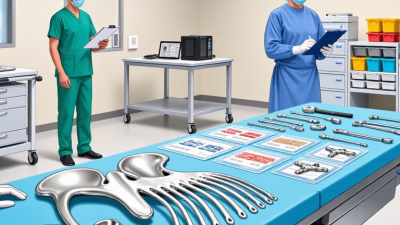
When buying orthopedic implants and instruments, inspect every item before it reaches the operating room. Check packaging seals, lot numbers, expiry dates, and the unique device identifier. The U.S. FDA states that UDI records improve device identification and traceability. Compare the implant with the purchase order and surgical plan. Confirm its size, material, laterality, and compatibility with the instrument set. Look closely for corrosion, damaged threads, rough edges, or incomplete markings. A clean box does not prove a safe product.
Training deserves equal attention. The surgical team should review the manufacturer’s instructions, instrument sequence, implant geometry, and sterilization requirements. Practice should include realistic models, controlled simulations, and emergency scenarios. Training records should identify each participant and competency assessment. WHO’s Global Guidelines for Safe Surgery reported surgical complication rates of 3% to 16%, with disability or death occurring in 0.4% to 0.8% of cases. Product familiarity can reduce preventable handling errors, but it cannot replace clinical judgment.
Ask for evidence, not promises. Request documented training, attendance records, and assessment criteria before scheduling a procedure. Confirm that staff can recognize a damaged instrument and isolate it immediately. Do not guess. One weakness is often overlooked: teams may inspect implants carefully but neglect trial instruments and backup components. That gap deserves review during every purchasing cycle. Keep inspection findings, training updates, and corrective actions in a traceable quality file. (Sources: U.S. FDA, Unique Device Identification System; WHO, Global Guidelines for Safe Surgery, 2009.)
| Tip | Evaluation Dimension | What to Inspect or Request | Objective Verification | Acceptance Criteria | Records to Retain |
|---|---|---|---|---|---|
| 1 | Define the intended clinical use | Confirm the anatomical site, fixation method, patient population, implant dimensions, compatible instruments, and required surgical approach. | Compare the product specification, instructions for use, sizing chart, surgical technique, and approved indications. | The intended use and available sizes match the procedure, facility protocol, and surgeon’s documented requirements. | Product specifications, instructions for use, sizing matrix, internal clinical requirement. |
| 2 | Verify regulatory and quality documentation | Request applicable market authorization, quality-management evidence, declaration of conformity where applicable, and current technical documentation. | Check that the documented device description, intended use, model or catalog reference, and manufacturing site correspond to the products being purchased. | Documentation is current, internally consistent, and applicable to the intended country and device configuration. | Regulatory authorization, quality certificates, declarations, supplier qualification checklist. |
| 3 | Confirm material and biocompatibility information | Review implant material, coating, surface treatment, radiographic markers, and any material-specific contraindications or allergies. | Compare the material designation with the technical file and applicable biological-evaluation information, including relevant ISO 10993 assessments where applicable. | Material identity, surface condition, and biological safety information are documented and suitable for the stated tissue contact. | Material certificate, coating specification, biological-evaluation summary, lot documentation. |
| 4 | Inspect physical condition and dimensional accuracy | Inspect implants for scratches, dents, deformation, corrosion, burrs, contamination, and damaged packaging. Inspect instruments for alignment, sharpness, articulation, and correct mating. | Use visual inspection, calibrated measuring tools, trial assembly, and functional checks against approved drawings or inspection criteria. | No visible damage or contamination; dimensions, interfaces, locking features, and instrument functions meet approved specifications. | Incoming inspection report, measurement results, photographs, nonconformance report if required. |
| 5 | Check packaging, sterility, and traceability | Review seal integrity, labeling, expiration date where applicable, sterilization status, lot or serial number, and unique device identification information where required. | Match the package label with the purchase order, packing list, implant record, and electronic inventory system. | Packaging is intact and legible; identification data support complete tracking from receipt through implantation or return. | Receiving log, label scan, sterilization record, implant traceability record. |
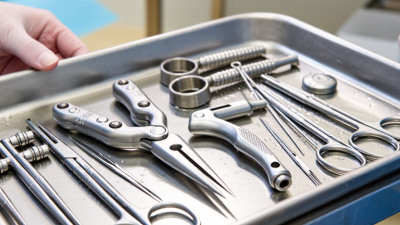
| 6 | Evaluate instrument compatibility and reprocessing | Confirm that instruments are compatible with the implant system and that cleaning, disinfection, inspection, packaging, and sterilization instructions are available. | Conduct a tray completeness check, simulate assembly, review reprocessing instructions, and verify that the facility can meet the required cycle parameters. | All required instruments are present, functional, identifiable, and processable using validated facility procedures. | Instrument inventory, tray checklist, reprocessing instructions, sterilizer-cycle records. |
| 7 | Confirm proper surgical training and competency | Verify procedure-specific training covering indications, implant selection, surgical steps, instrument use, contraindications, complications, and post-operative considerations. | Review training attendance, competency assessment, surgeon authorization, and availability of the current surgical technique and instructions for use. | Each authorized user has completed documented training and demonstrated competence before independent clinical use. | Training roster, competency checklist, assessment results, authorization record, training revision history. |
WhatsApp us